Automating camera raw settings
Imagine you did a 360 degree photo-shoot of a product and now you are not happy with the lightning, color, sharpness and size of your image. Will you work on all the 360 images individually to adjust the same thing? The answer is a big “NO”, if you know about the automating feature of camera raw settings that is available in Adobe Bridge.
Develop Settings in Adobe Bridge
In the ‚Edit‘ menu, Adobe Bridge has a “Develop Settings” feature. This allows you to easily copy the settings applied to one image to multiple other images.
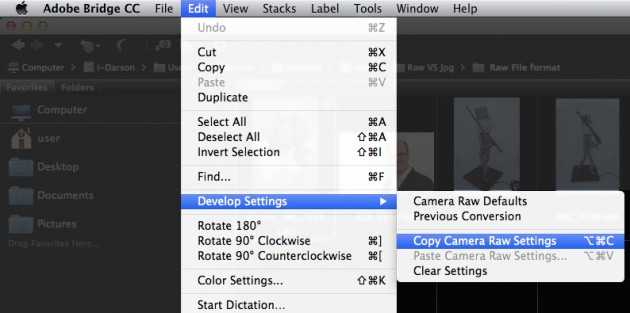
Copy Camera Raw settings
To copy the Camera Raw Settings, open the corrected image in Adobe Bridge. Then go to the ‚Edit‘ menu in Adobe Bridge, select „Develop Settings“ and choose “Copy Camera Raw Settings”.
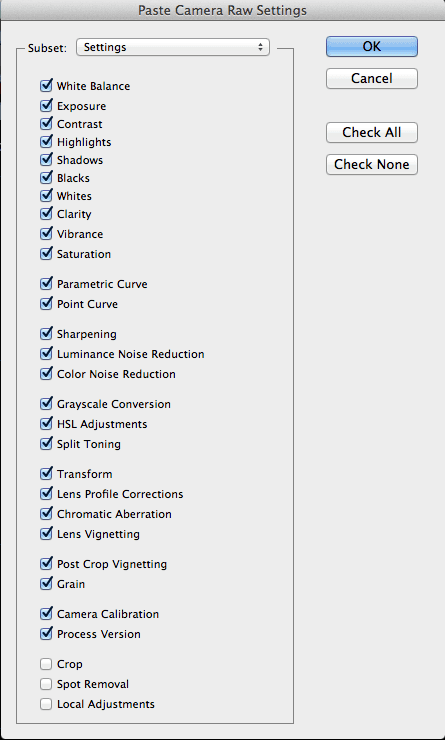
Paste the Camera Raw settings
Once you have copied the settings, select those images that you want similar corrections applied to. Go to the same location where you find “Develop Settings”. Now choose “Paste Camera Raw Settings”. A pallet popups up where you can choose what subset settings you want to paste and which not.
Clear the settings
You can also clear those Camera Raw Settings applied. Go to to “Edit > Develop Settings > Clear Settings” if needed.
Especially in case of multiple images that need to be adjusted, f.i. with 360 degree images, this handy feature will save you a lot of time!