Restyling your room’s walls and floors using Photoshop
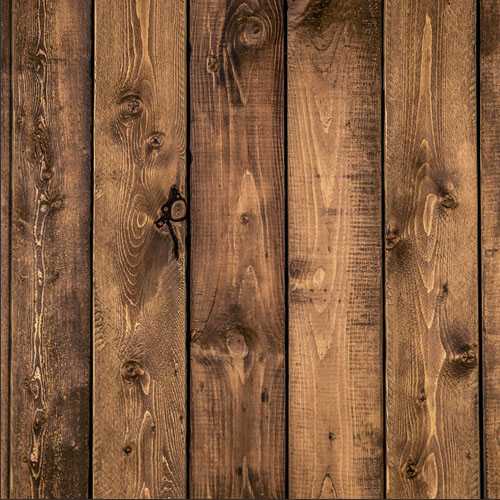
There may be times when you would like to imagine the walls of your house with new wallpaper and/or the floors with new tiles or parquet. Before you actually go ahead with the project, wouldn’t it be nice to actually see how the end result will turn out with your choices? This can be done by transforming a realistic image into a seamless pattern in Photoshop. In the past turning images into seamless repetitive patterns was a difficult job. Nowadays this can be done quite easily. In this article we’ll guide you step by step through the digital restyle of your room’s wall or floor. For the pattern, we have chosen a vertical wooden pattern of size 500 X 500 pixels.
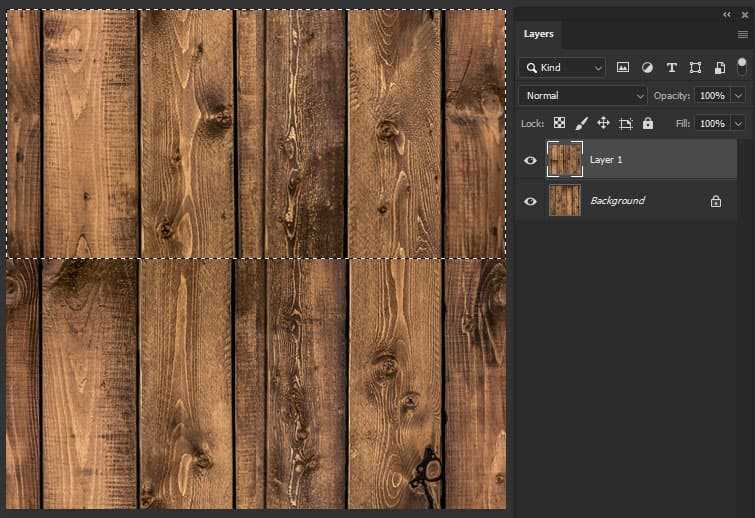
Step 1: Set your pattern in Photoshop
Duplicate the background layer, Go to – Filters > Others > Offset. A pop-up window will appear where you need to insert the horizontal and vertical value that defines the offset undefined area. For this we placed the value of 250 / 250 horizontal and vertical (50% of the actual image size). This resulted in a pattern that joined and to aligned in the center.

Step 2: optimize the pattern
Now you can see the lines in the middle. Duplicate the layer and select half of the image till the joint seam. Transform the selection by pressing ‚Crtl + T‘ to overlap the two layers in such a way that the end of the patterns look adjoining.
Again, select the part that shows the separation manually and transform it the same way. Use the Stamp tool to remove any unjoined part.

Step 3: Make the pattern seamless
When you’ve succesfully completed the transformation some other things need to be kept in mind. Since the patterns are used for a repetitive purpose, we need to clean up any pending joint parts which are not even. For this, we removed the center vertical joint line of the image by duplicating the image and moved it in such a way that the line got covered.
Step 4: Optimizing the pattern
Finally, a seamless pattern is complete. To make sure the pattern is seamless, run the filter again. This time you should not see any seams. If you do, run the filter again and retouch the necessary part once more. Now merge all layers by going to: ‚Edit > Define Patterns…‘ On the pop up window, give a name to the pattern to save it. On the Layer pallet on ‚Adjustment Layers‘ select ‚ Patterns ‚.
Step 5: Apply the pattern
To apply the pattern, click on the ‚Pattern Fill‘ popup window. You can scale the pattern to the desired value and even move / drag the patterns over the background image. Since the seamless pattern is ready, you can apply this to any image or background. To use the pattern, go to: Edit > Fill, Layer Styles, Pattern Fill Layers, Healing Brush, Pattern Stamp, Shape Tools.
