Image editing with the Camera Raw Filter
Recently, Adobe has updated its Photoshop CC with the new feature of Camera Raw Filter. Camera Raw is used a lot for editing raw images. Until recently, you had to open your image in a separate screen for editing. After editing, the image was opened in Photoshop to further process it. The new Camera Raw Filter has made the life of an image editor a lot more easy. Not only are you able to process a lot of different file types like Raw/DNG, Jpeg or Tiff. The Camera Raw Filter allows you to process the images directly in Photoshop. This means that the process of image editing can be done in less time with a huge difference in quality output.
Non-destructive editing with the Camera Raw Filter in Photoshop
By using the Camera Raw Filter, you’re able to easily apply filters to your images directly in Photoshop. These filters can also be set as non-destructive filters, by transforming the image to a Smart Object, preserving the original beauty of an image. I this article we’ll explain how this works.
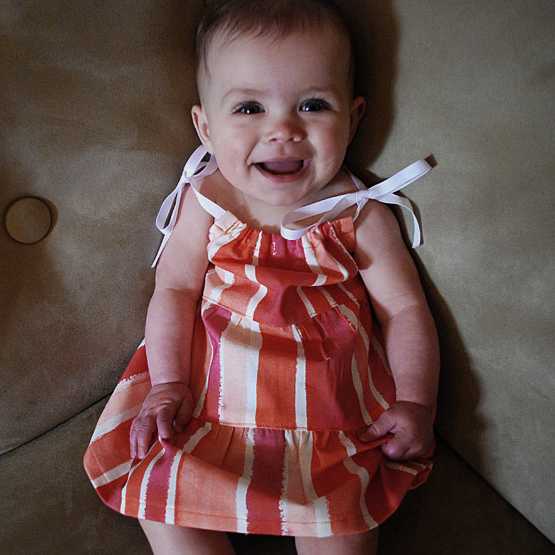
Let’s begin by selecting an image on Photoshop. We selected the following image of a Baby.
Step 1:
First, we transform the image into a Smart Object. To do that, we right click on the layer panel and choose Convert to smart object. Now we go to Filter > Camera Raw Filter.
Step 2:
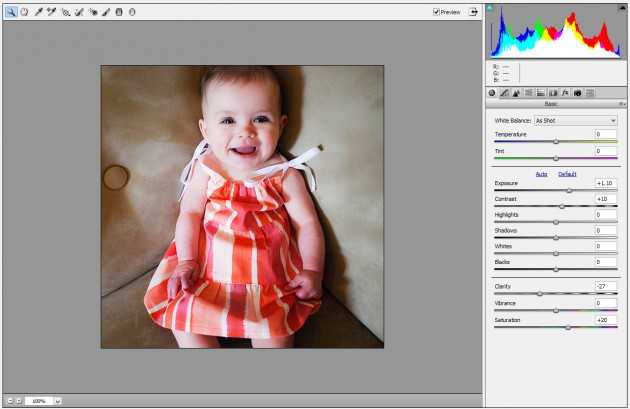
From the panel on the right, we select Basic. There you’ll find the Temperature, Exposure Contrast, Clarity etc. Use the slider to correct the level of adjustment as needed. We used bit more Exposure, Contrast, Clarity and Saturation to bring up the image bright and attractive.
Step 3:
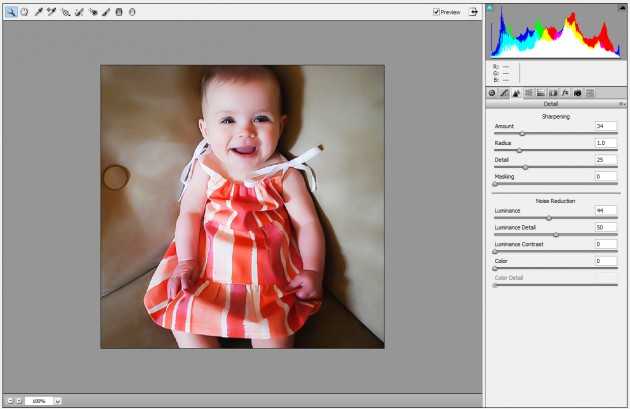
Now we go to Detail and try adjusting some sharpness and luminance values. This tab works great for smoothing the image and removing noise.
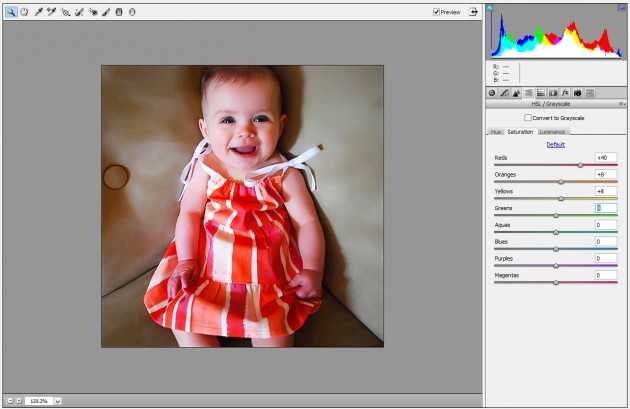
Step 4:
We move along to the HSL/Grayscale tab and select the Saturation secondary tab. By using the sliders, we increased the saturation in the red, orange and yellows of the photo. This raises the red and yellow contrast.
For now, we’re good with the look, and press OK to apply these modifications. If needed, we can make any final adjustments on the Layer Panel.
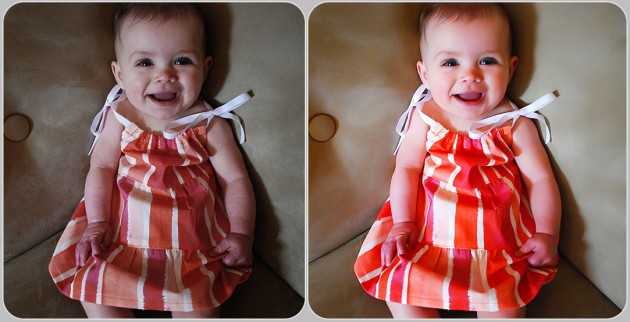
The result
Below you find the final image before and after the photo correction.