New Select and Mask Feature in Photoshop 15.5
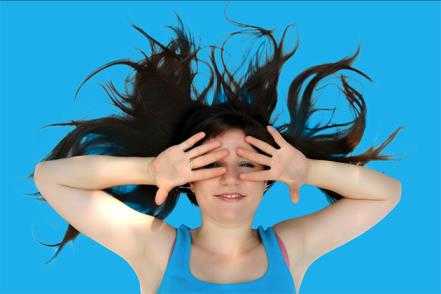
Good news for Refine Edge users! In the latest version of Photoshop (15.5), the Refine Edge tool has been improved and revamped as Select and Mask feature (the Refine Edge option is no longer available now). It’s much easier now to make selections of tricky areas such as hair, furs, etc with this new feature. Let’s see how to use it. Below is a sample of the raw file we will use:.

Make a rough selection
First, we start by making a rough selection of the model. This can be done with any automatic selection tool or path. If you don’t want to do it, just turn on quick selection mode.
The Select and Mask feature
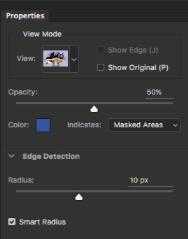
In the top menu go to: Select > Select and Mask. Now you will get a tool bar at the left side and the properties options will appear on the right side of the screen with lots of adjustment options. For this image, we have chosen the On Overlay mode with 50% opacity and we selected a blue colored background.
Remove the background from the image
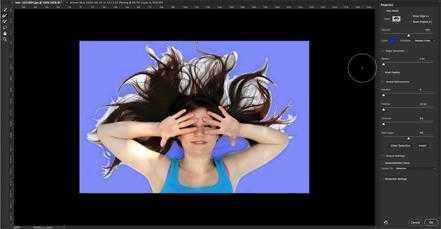
Now, from the left tool bar, use the Refine brush tool to remove the background from the image. By using this tool, it automatically removes the background whilst the blurness in the hair is maintained.

Naturally clipped hair
However, there still appear some white lines at the edges. To remove it, you need to adjust the edge detection values. For further refinement,you can enable the Decontaminate Colors box in the output settings. This removes any remaining red hue around the edges of your selection. This makes hair cutout look natural.

Recover accidentally removed areas
During this process, if accidentally any required areas are removed, we can recover this part by using the lasso tool or the quick selection tool from the left tool bar.
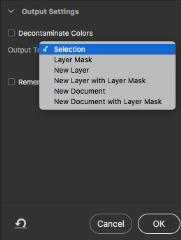
Select output options
After the desired quality is matched, select your required output options from the right properties panel. Here we have selected New Layer with Layer mask for non-destruction workflow.
The final result
Here is the final output in different background colors: