Remove objects from a photo with the clone and stamp tool in Photoshop
Removing objects or elements from a photo can fairly easy be done with the clone tool in Photoshop. But what do you do if you want to reproduce a certain pattern and/or a complex perspective at the location of the removed objects? In this article, we’ll explain how to do this with the clone and stamp tool in Photoshop.
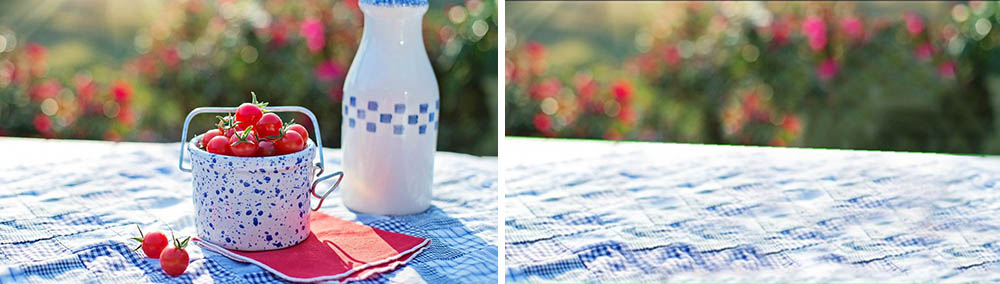
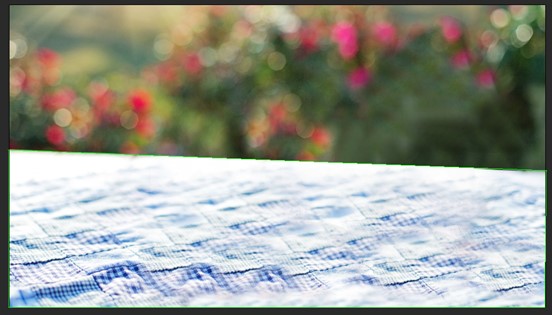
As an example we will use this image of a bowl and a jug on a table with a tablecloth. We are going to remove the bowl and the jug from the photo so that the end result is an empty table with only the tablecloth.
Step 1: Make a selection
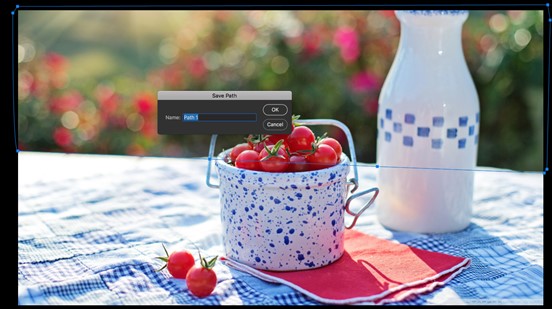
First we make a selection of the top part of the photo with the Pen tool. In your ‘Paths’ tab, save the selected area as a clipping path and rename it for later use. Go to ‘make selection’, give a feather radius of 1 or 2 pixels at ‘Rendering’, so that the selection edge becomes a bit softer. You can apply the feather from Menu > select> modify> feather.
Step 2: Delete objects with the clone tool
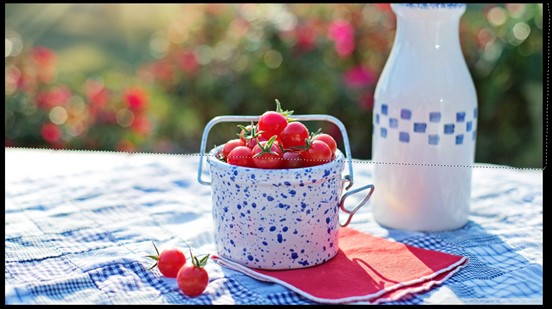
Copy your selection to a new layer. In this new layer you can delete objects with the clone tool.
The clone tool in Photoshop works like this:
Hold down the ALT /option key
Click in the selected area around the object you want to remove to take a sample
Release the ALT / option key and move your mouse over the objects you want to remove
Repeat this process a few times until you’ve retouched the objects away.
After completing the process, press Cmd or ctrl + D to deselect the area.

Step 3: Determine perspective
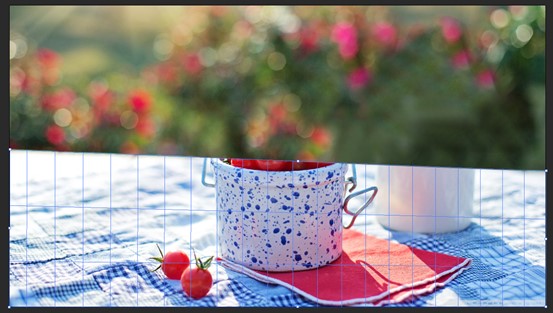
Now let’s get started with the tablecloth. Create a new layer for this. Now go via the menu to Filter > vanishing point. Then select the ‘Flat’ option. Make a selection of the lower part of the image by clicking on the points that you want to include in the selection. Make sure they are accurately positioned at all points. You will now see a blue grid of lines running over the image. This marks the area you want to keep perspective on. Note: Once you have made the marker, it can consist of 3 colors: red, yellow or blue. A red grid is best. A yellow grid is sort of ok. A blue grid: the results will not be as good. So play with the points of the grid a little more until you have a red rectangle.
Step 4: Retouch with the Stamp Tool
After you have determined the perspective, you can use the stamp tool to remove the objects and fill the space in a natural way. You do this with the stamp tool. Click on the stamp tool. You can now select a number of options. For best results, set the hardhead to ‘0’. Make sure the ‘Retouch’ option is set to ‘on’. Only then will the background color and texture be copied as naturally as possible in the correct perspective. Hold down the ALT / option key to select the area. Release the ALT / Option key and hover your mouse over the objects you want to remove to clone the selected area.
See the end result below.
Need help removing objects from a photo?
Could you use some help with removing objects from a photo, retouching or other image editing? Contact us by e-mail or call: +31 (0)168 476 144. We have a large production studio full of Photoshop experts and are happy to help you!